
I spent a lot of years watching perfectly good cars get towed in for “bad alternators” that turned out to be a loose battery terminal, or a “dead battery” that was really an alternator that quit charging. The good news is you can sort out most of this at home with a basic digital multimeter and ten minutes of patience.
This guide walks you through three simple checks: battery resting voltage, battery voltage while cranking, and alternator charging voltage. No guesswork, no parts cannon (that is random parts swapping until something works).

What you need
Tools and supplies
Digital multimeter with DC volts and ideally a min-max function (helpful, not required)
Safety glasses and snug gloves (optional, but I recommend them)
Small wire brush or battery terminal brush (only if you find corrosion)
Helper for the cranking test (optional, but it makes life easier)
Multimeter setting
Set the meter to DC volts. On most meters that is marked V with a straight line and dots under it. If your meter is not auto-ranging, choose the 20V DC range.
Quick safety note
You are not poking around spark plugs here, but a car battery can deliver serious current if you short it. Keep metal tools away from the battery terminals, and do not let the red and black probes touch each other while they are on the battery.
Before you test
Check the basics: Terminals clean and tight, no obvious battery case swelling, and the belt on the alternator is present and not shredded.
If you just drove or just charged: The battery can hold a surface charge and read a little high. Let it sit a few hours for the cleanest resting reading, or do the quick headlight trick in Step 1.
Step 1: Battery resting voltage
This is your baseline. It tells you whether the battery is charged enough to be a fair test, and whether it is behaving like a healthy 12V battery.
How to do it
Turn the car off and remove the key.
Turn off lights, HVAC, and accessories. Close the doors so interior lights do not skew the reading.
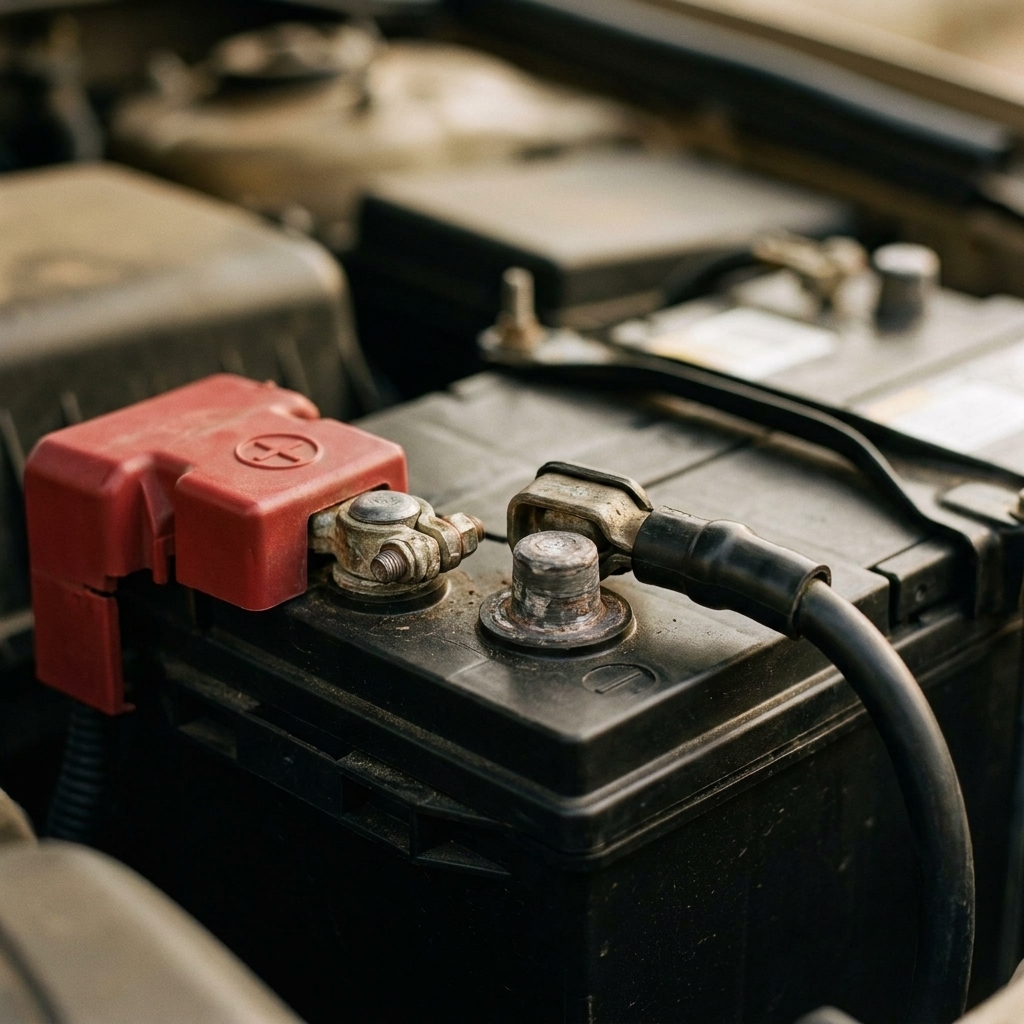
Touch the red probe to the positive terminal (marked
+, often with a red cover).Touch the black probe to the negative terminal (marked
-, usually connected to a black cable).
What the number means (12V lead-acid)
About 12.6 to 12.7V (after resting): Typical “fully charged” for many flooded lead-acid batteries.
About 12.7 to 12.9V (after resting): Common for AGM batteries and sometimes seen right after charging.
12.4 to 12.6V: Partially charged. The car may still start, but you should charge it soon.
12.2 to 12.4V: Low charge. Expect slow cranking, especially in cold weather.
Below 12.2V: Very low. Either the battery is discharged, aging, or you have a drain or charging problem.
Around 10.5V (resting): Classic sign of a bad cell in a 12V battery. That battery is usually living on borrowed time.
Tip from the shop floor: If you cannot wait for the battery to rest, turn the headlights on for 30 seconds, turn them off, then test again. That helps knock surface charge down to reality.
Step 2: Cranking voltage
A battery can look okay at rest and still fall flat when you ask it to do real work. This test catches weak batteries and high resistance in the battery connections.
How to do it
Keep the meter connected to the battery posts: red on positive, black on negative.
Have a helper start the car while you watch the meter, or position the meter where you can see it from the driver seat.
Watch the lowest voltage the moment the starter engages. If your meter has min-max, use it.
Cranking targets (rule of thumb)
9.6V or higher while cranking (around 70°F / 21°C): A common benchmark for a “passes the sniff test” crank. Just remember it originally comes from standardized battery load testing, not every exact real-world start.
Above 10V while cranking: Usually a strong sign the battery has decent muscle.
Below 9.6V: Weak battery, high resistance at the terminals, or a starter drawing more current than normal.
Starter draw varies by engine size, oil viscosity, and temperature. In cold weather, voltage will sag more during cranking. A borderline battery in summer can become a no-start the first cold snap.
If it drops hard, do this before buying parts
Check terminal tightness: Loose clamps are a classic. They can look fine and still slip.
Look for corrosion: White or blue-green fuzz adds resistance. Clean it and retest.
Check the ground cable connection: Follow the negative cable to where it bolts to the body or engine. A crusty ground can mimic a bad battery.
Step 3: Charging voltage
Once the engine is running, the alternator should recharge the battery and power the car’s electrical system. This is where you confirm the charging system is doing its job.
Safety with the engine running
Keep sleeves, hair, probes, and meter leads clear of belts, pulleys, and fans. Do not lean tools over the battery where they can slide into a terminal.
How to do it
Start the engine and let it idle.
With the meter still on DC volts, probe the battery terminals again: red to positive, black to negative.
Read the voltage at idle.
Raise engine speed to around 1,500 to 2,000 rpm for a few seconds and watch if the voltage stays stable.

Normal alternator voltage range
13.8 to 14.6V: Typical healthy charging voltage on many vehicles.
Low 13s: Can be normal on some vehicles depending on temperature and smart charging strategy, especially if the battery is already topped off.
Below about 13.2V: Often undercharging, unless the vehicle is intentionally in a low-charge mode. That is why the load check in Step 4 matters.
Above about 14.8V (especially 15V+): Overcharging. This can cook a battery and damage electronics. Time to diagnose ASAP.
Modern smart charging note: Some newer cars intentionally vary voltage to improve fuel economy and battery life. You may see charging voltage dip closer to battery voltage once the battery is topped off. The best clue is whether voltage rises when you add electrical load.
Step 4: Load check
This separates a charging system that looks okay at idle from one that collapses when you turn stuff on.
How to do it
With the engine idling, turn on a few loads: headlights, rear defroster, and blower fan.
Watch the voltage at the battery.
Bring rpm up to about 1,500 rpm again and see if it recovers.
What you want to see
Voltage may dip briefly when you switch loads on, but it should usually settle back in the 13.5V to 14.6V neighborhood on many vehicles.
If voltage sits near 12.6V with the engine running and loads on, the alternator is likely not keeping up, or the battery cables and connections are preventing charging current from reaching the battery.
Low charging voltage: common causes
If your running voltage is low, do not automatically blame the alternator. These are the usual suspects I check first:
Belt issues: Glazed, loose, or slipping belt.
Charging fuse or fusible link: Some cars will run, but the alternator output never makes it back to the battery if a main fuse or link is open.
Bad connections: Corrosion at the battery, alternator output stud, or main grounds.
Sense wire or control circuit problems: A broken sense wire, poor ground, or ECU control issue can keep the alternator from being commanded to charge normally.
Battery current sensor quirks (smart charging systems): A sensor on the negative cable can affect charging strategy if it is failing or disconnected.
Battery light on: If the charge light is on, treat it as a real clue, not a suggestion. It often points to a charging circuit fault.
Common readings
Scenario A: Low resting voltage, normal charging voltage
If the battery is at 12.1V resting but the alternator charges at 14.2V running, the charging system likely works. The battery may simply be discharged from short trips, a recent drain, or age. Charge the battery fully and retest. If it will not hold a charge, it is battery time.
Scenario B: Good resting voltage, low charging voltage
A battery sitting at 12.6V but only charging at 12.8 to 13.1V suggests undercharging. Check belt condition and tension first. Then look at alternator output, charging fuses or fusible links, wiring, and grounds.
Scenario C: Resting voltage ok, cranking voltage drops low
This often points to a weak battery, dirty terminals, or high resistance in cables. Clean and tighten connections and retest. If it still drops hard, have the battery load tested or replace it if it is older and showing symptoms.
Scenario D: Charging voltage too high (15V+)
Overcharging can boil the battery, warp plates, and fry sensitive electronics. The most common causes are a failing voltage regulator (often built into the alternator), a sense wire problem, or poor grounds that make the system “think” voltage is low. Do not ignore this one.
Optional: Voltage drop checks
If your numbers are confusing, voltage drop testing is the next step. It tells you if the battery cables or grounds are stealing voltage under load. You are measuring loss across a cable or connection while the circuit is working.
Positive cable drop (cranking)
Set meter to DC volts.
Put the red probe on the battery positive post (the lead post itself, not the clamp).
Put the black probe on the starter motor main power terminal (or the alternator output stud if the starter is hard to access).
Have a helper crank the engine and note the reading.
Rule of thumb: aim for under about 0.2 to 0.3V on that one cable during cranking. Up to about 0.5V is a strong clue you have corrosion, a loose connection, or a failing cable.
Ground side drop (cranking)
Put the red probe on the starter housing or a clean engine metal spot.
Put the black probe on the battery negative post.
Crank and read the drop.
Same idea here: under about 0.2 to 0.3V is a good target for the ground side during cranking. High drop here screams “bad ground,” and bad grounds cause all kinds of spooky electrical issues.
If you want a simple big-picture check, many techs like to see total cranking voltage drop across both sides stay roughly under about 0.5V on a healthy setup, but treat that as a guideline, not a law of physics.
Battery types
Most of the voltage targets above apply broadly, but a few notes help you avoid false alarms:
AGM batteries often sit a touch higher at rest when fully charged (12.7 to 12.9V is common after resting).
Start-stop cars may use AGM or EFB batteries and have smart charging behavior that varies voltage more aggressively.
Hybrids and EVs still have a 12V battery, but charging behavior is controlled differently (DC-DC converter instead of a traditional alternator). The same multimeter approach works, but expect different “engine running” conditions.
When a multimeter is not enough
A multimeter gets you far, but it does not measure cold cranking amps or alternator ripple like a dedicated tester can. Consider a professional test if:
The battery is more than 3 to 5 years old and you have intermittent no-starts.
Your charging voltage looks okay, but the battery keeps dying overnight (possible parasitic draw).
You see weird electrical behavior like flickering lights, random warning lights, or modules resetting.
The alternator is charging but you suspect a bad diode (AC ripple). Many meters can measure AC volts at the battery to spot excessive ripple, but interpretation can vary by vehicle.
Quick FAQ
Can I test the alternator by disconnecting the battery while the engine runs?
No. That old-school trick can create voltage spikes that damage modern electronics. Use the multimeter method instead.
My battery shows 12.6V but the car still clicks. What gives?
Voltage alone does not guarantee capacity. You can have good resting voltage but weak internal plates. Also check for loose or corroded terminals, especially the negative cable where it bolts to the body or engine.
Is 13.2V charging okay?
Sometimes, especially on vehicles with smart charging and a fully topped-off battery. If you turn on headlights and rear defrost and it stays low or drops toward 12.6V, you likely have an undercharging issue.
What voltage means a battery is “dead”?
Below about 12.0V, a typical lead-acid battery is deeply discharged. It might recover with a proper charge, but repeated deep discharges shorten its life fast.
My driveway takeaway
Think of your battery and alternator like a tag team. The battery provides the big shove to start the engine, and the alternator keeps the party going afterward. With a multimeter, you are just checking whether each teammate is showing up.
If you want the simplest path: about 12.6V resting (after the battery rests), stays around 9.6V or higher cranking (rule of thumb), and around 14V running is the happy zone for a lot of cars. Anything far outside that is your clue to slow down, test again, and fix the actual problem instead of guessing.