
I have lost count of how many “dead battery” tows I saw in the shop that turned out to be a tired alternator, or a perfectly fine alternator paired with a crusty battery terminal that could have been cleaned in five minutes. The good news is you don’t need a fancy scan tool to figure this out. With a little patience and a basic multimeter, you can usually pinpoint whether the battery is the problem, the alternator is the problem, or something else is sneaking in through the side door.
This guide walks you through a simple, repeatable process. No guessing, no parts cannon, and no getting sweet-talked into an upsell at the counter.

Safety first
- Wear eye protection. Batteries can vent acid mist and hydrogen gas.
- No smoking or sparks near the battery. Hydrogen is real, even if you can’t smell it.
- Keep hands, clothing, and tools away from belts if you run the engine for charging tests.
- If you see a swollen battery case, leaking fluid, or you smell rotten eggs, stop. Ventilate the area, keep sparks away, and do not jump or charge it until you figure out what’s going on. The battery may be failing, or it may be getting overcharged.
Tools you need
- Digital multimeter (a $20 to $40 one is fine)
- Battery terminal brush or small wire brush
- 10mm wrench or socket (because of course)
- Jump pack or jumper cables (optional but helpful)
- Gloves and safety glasses
If you have access to a battery load tester, great. If not, we can still get strong answers with voltage tests and a couple of simple “loaded” checks.
Step 1: Read the symptoms
Clues it’s the battery
- Slow crank: the starter turns the engine over sluggishly, like it’s waking up from a nap.
- Rapid clicking when you turn the key: often low battery voltage.
- Interior lights are dim and get noticeably dimmer when you try to crank.
- It starts with a jump, then seems fine afterward (at least for a while).
- It fails after sitting overnight or for a few days.
Clues it’s the alternator
- Battery light on the dash while driving. On many cars this means the charging system isn’t happy, not “your battery is low.”
- It dies while driving or stalls at a stop and won’t restart.
- Electrical weirdness ramps up with time: headlights dim at idle, blower motor slows, radio resets, gauges act odd.
- You jump it, it starts, then dies again shortly after.
- Burning smell near the alternator or belt area (could be a slipping belt or failing alternator).
Real life caveat: symptoms overlap. A failing alternator can kill a good battery, and an old battery can make a healthy alternator look bad. That’s why the next steps matter.
Step 2: Quick inspection
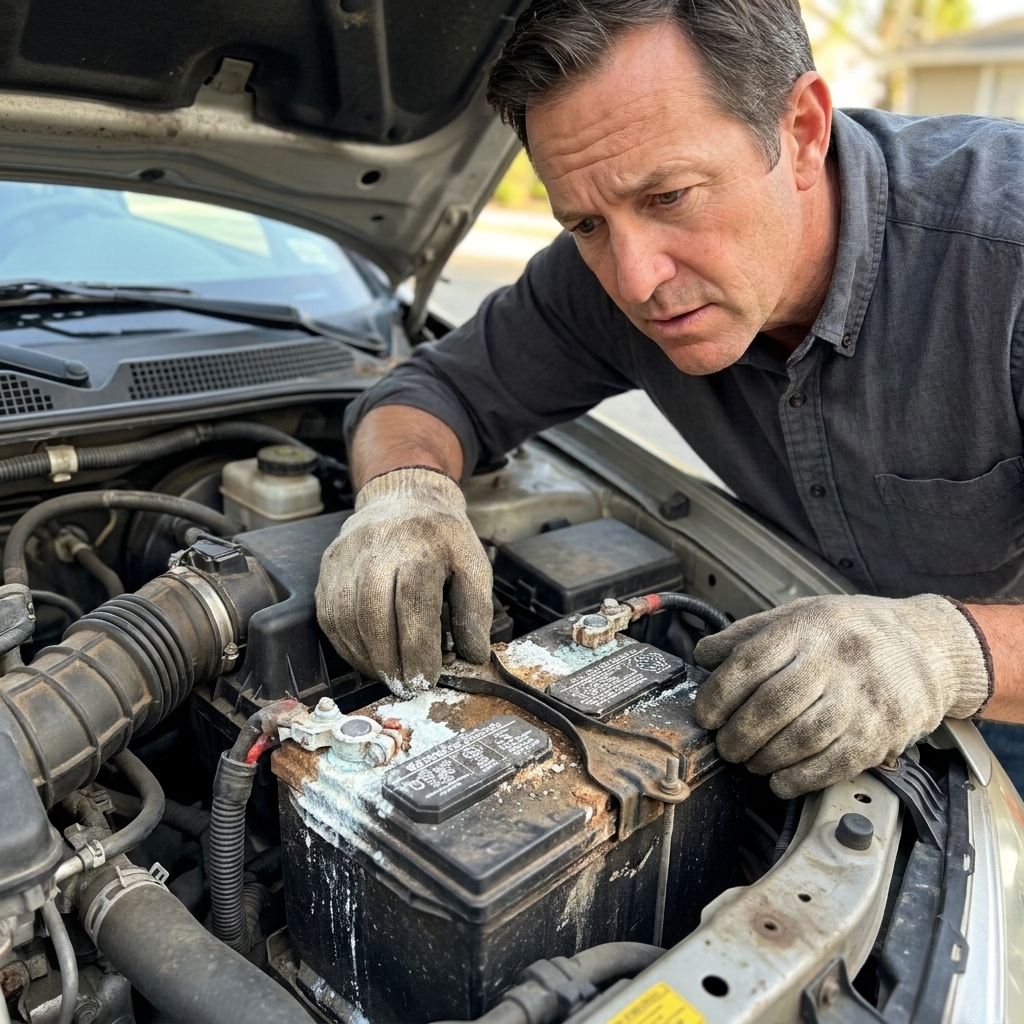
Check the battery terminals
Pop the hood and look for:
- White or blue-green crust on the terminals
- Loose clamps you can wiggle by hand
- Frayed or broken cables, especially the negative cable where it bolts to the body or engine
Dirty or loose terminals can mimic a dead battery and even cause charging issues because the alternator can’t “see” the battery properly. Clean and tighten before you start condemning parts.
Check the serpentine belt
Your alternator is belt-driven on most vehicles. If the belt is missing, loose, glazed, or shredded, the alternator can’t charge.
- Look for cracks, missing chunks, or shiny “glazed” ribs.
- If the belt tensioner is bouncing or the belt is flapping, that’s a problem.
Step 3: Battery voltage (engine off)
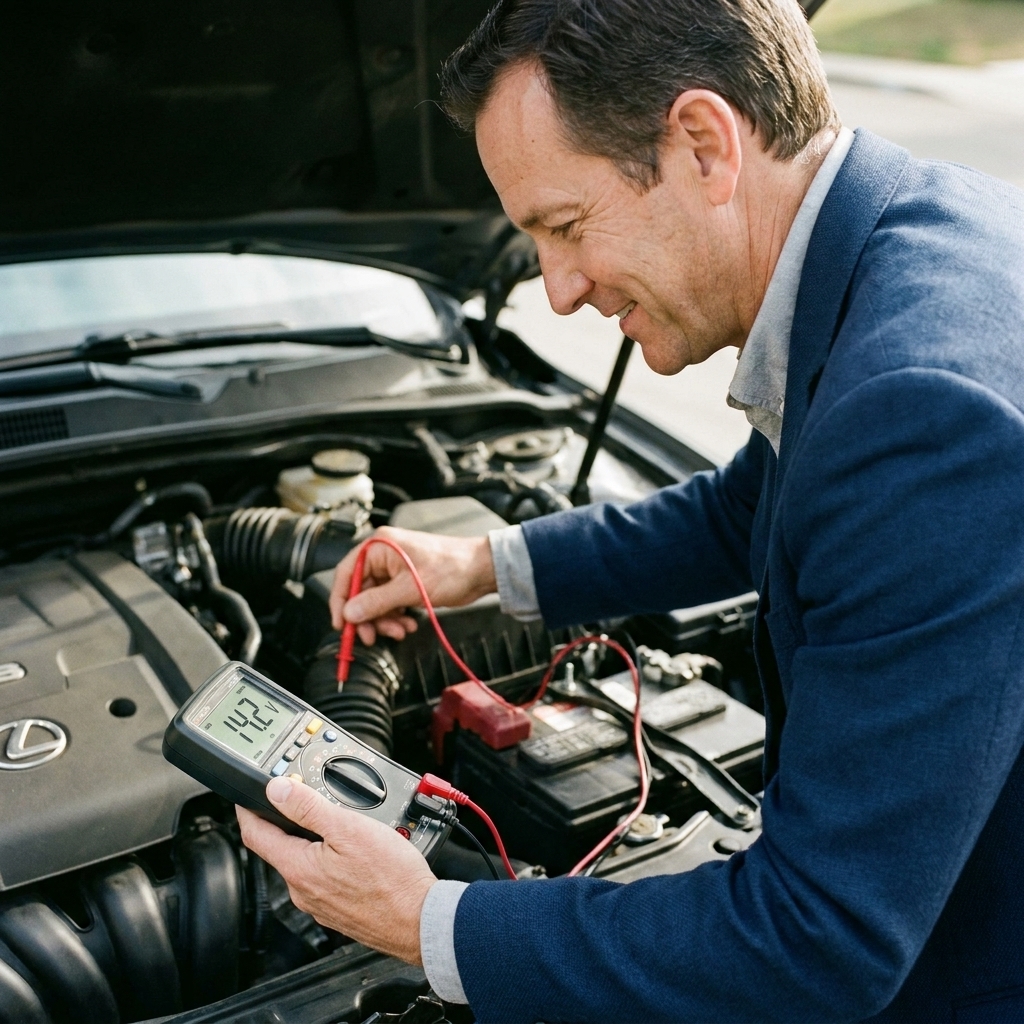
This is the foundation. For the most repeatable reading, let the car sit with the engine off for at least 15 minutes, longer is better. If you just drove it or just had it on a charger, you may be seeing surface charge. A quick way to knock that off is to turn the headlights on for 30 seconds (engine off), turn them off, then wait 1 to 2 minutes before measuring.
Set your multimeter to DC volts:
- Red probe on positive (+)
- Black probe on negative (-)
What the numbers mean
- 12.6V to 12.8V: typical “fully charged” range for a rested lead-acid battery around room temperature (AGM batteries can read slightly higher)
- 12.4V: roughly 75% charged
- 12.2V: roughly 50% charged
- 12.0V or lower: very low charge, likely no-start territory
- Below about 11.8V: deeply discharged, failing, or something drained it hard
Important: voltage is a great first pass, not a final verdict. A battery can show “good” voltage and still collapse under load.
Step 4: Cranking voltage
This one tells you a lot with almost no extra effort.
- Keep the multimeter probes on the battery terminals.
- Have a helper crank the engine for 3 to 5 seconds while you watch the meter.
What to look for
- Stays above about 9.6V while cranking: generally strong enough for starting in normal temps (this classic 9.6V rule is based on warmer conditions and longer load tests, so treat it as a guideline, not a law of physics)
- Drops below 9.6V quickly: battery is weak, discharged, or you’ve got high resistance in the cables or connections
- Drops to 8V, 7V, or lower: the battery is often done, or you have serious cable and connection issues
If the starter barely turns and voltage tanks hard, don’t blame the alternator yet. The alternator doesn’t crank the engine. The battery does.
If the battery voltage looks decent but cranking is still slow, that’s when I start suspecting bad terminals, a weak ground, or a starter pulling too much current. A simple voltage-drop test across the cables can reveal that, but at minimum, recheck every connection you can touch and clean.
Step 5: Charging voltage (running)
If you can get the engine running, this is the alternator check that solves most mysteries.
- Start the engine.
- Measure voltage across the battery terminals again.
Healthy charging range
- 13.8V to 14.7V: typical for many vehicles once idle stabilizes
- 13.2V to 13.7V: can be normal on some smart-charging systems, but watch it under load (next step)
- 12.6V or less while running: not charging, or charging is severely weak
- 15.0V or higher: if it’s sustained at idle after things settle (not just a brief cold-start blip), you may have an overcharging or regulator problem that can cook a battery and electronics
Modern vehicles with smart alternators can vary charge voltage based on temperature and battery state of charge. That’s why the next test matters.
Step 6: Charging under load
With the engine idling, turn on a few big electrical loads:
- Headlights (high beams if safe)
- Rear defroster
- Blower motor on high
Now watch the voltage at the battery.
- Stays mostly in the mid 13s to mid 14s: alternator is likely keeping up.
- Drops toward the low 13s and stabilizes: may be normal, especially on smart-charging systems. As a general rule, once it stabilizes you like to see it stay around 13.0 to 13.2V or higher at idle, but vehicle strategy matters.
- Drops into the 12s and keeps falling: alternator isn’t supplying enough current, the belt may be slipping, or wiring connections are poor.
Step 7: Jump and run check
If the car is dead and you jump-start it, pay attention to what happens next:
- If it runs fine for 20 to 30 minutes and restarts: the alternator is probably charging, and your battery may simply be weak or discharged from sitting.
- If it dies soon after removing the jump pack or cables: charging system is suspect, or the battery is so bad it can’t buffer the electrical system.
Don’t treat this as a definitive test, but it’s a useful clue when combined with the voltage numbers above.
Common curveballs
Loose or corroded cables
A crusty terminal can prevent both starting and charging. Clean and tighten first. I’ve seen cars get a “new alternator” they didn’t need because the real culprit was corrosion hiding under the terminal clamp.
Bad engine ground
If the negative cable ground to the engine block is loose or corroded, you can get slow cranking, weird electrical behavior, and low measured charging at the battery. Check ground straps.
Blown main fuse or fusible link
Some vehicles have a high-amperage fuse between the alternator and battery. If it blows, the alternator can be producing power but it can’t reach the battery. You’ll see low voltage at the battery even though the alternator itself is fine.
Starter problems
A failing starter can draw excessive current and drag voltage down, making you suspect the battery. If your battery tests good but cranking is still labored, don’t ignore the starter.
So which is it?
- Battery voltage is low (around 12.0V or less) and cranking voltage drops below about 9.6V: the battery is likely discharged or failing. Charge it fully and retest. If it won’t hold, replace it.
- Battery tests okay, but running voltage stays around 12.6V: the alternator isn’t charging, or the belt, fuse, or wiring is stopping the charge.
- Running voltage is high (sustained 15V+): overcharging issue. Don’t keep driving it until it’s diagnosed. This can fry the battery and sensitive modules.
- Battery keeps going dead, but charging voltage looks normal: suspect a parasitic drain, a battery that can’t accept charge anymore, or lots of short trips that never replenish the battery.
If the battery is dead
Charge it properly
Jump-starting isn’t charging. It’s emergency lighting the fuse. If your battery was low, put it on a proper charger for a few hours, ideally overnight on a smart charger.
Get it tested
Many parts stores can do a conductance test for free. Better yet, if you have access to a real load tester, that’s the gold standard.
Replace it if it’s old
Most batteries live around 3 to 5 years depending on climate. If yours is pushing that and it’s acting up, don’t be shocked if it’s simply time.
If the alternator is failing
Check belt and connections
Before you buy an alternator, inspect belt condition and tension, check the alternator electrical connector, and check the main charging wire for looseness or corrosion.
Know what you’re buying
Remanufactured alternators can be hit or miss. If your budget allows, a quality new unit or an OEM-grade reman often saves headaches. If you go reman, keep the receipt and test charging voltage immediately after install.
Don’t ignore the battery
A dying alternator often deep-discharges the battery. Even after the alternator is replaced, the battery may be damaged and may fail shortly after.
Parasitic drain basics
If your charging voltage looks normal but the battery keeps dying after the car sits, you may have a parasitic draw. This is where you can turn a simple test into an expensive multimeter fuse, so take it slow.
- Start simple first: make sure nothing obvious is staying on (dome light, glovebox light, trunk light, aftermarket dash cam, phone charger, amplifiers).
- Don’t rush the car: many vehicles stay “awake” for 10 to 45 minutes after you shut them off. If you test too early, you’ll think you have a drain when you don’t.
- Safer approach: use a clamp meter designed for DC amps if you have one. It’s the cleanest way to check draw without disconnecting anything.
- If you use a multimeter in series: set it to amps, move the lead to the correct amps jack, and start on the highest amp range. Connect it between the negative battery post and negative cable (battery disconnected), then wait for the car to go to sleep.
- What’s “normal”: many cars settle somewhere around 20 to 50 milliamps (0.02 to 0.05A), but some are a bit higher. Hundreds of milliamps after the car is asleep is where you start hunting.
- Quick isolation trick: if you confirm a draw, pull fuses one at a time (with the meter still connected) and watch for a big drop. That points you to the circuit.
If you’re not comfortable doing this, it’s a good time to pay for diagnosis. Parasitic drains can be fast to find with the right tools, and painfully slow without them.
Hybrid and EV note
This guide is for the 12V battery and 12V charging system. Hybrids and EVs still have a 12V battery, but they don’t always charge it the same way a traditional alternator does. Do not poke around any orange high-voltage cables or components. If you’re unsure what you’re looking at, get help.
FAQ
Can a bad alternator cause a car to start, then die?
Yes. Once the battery’s stored energy is used up, the ignition and fuel systems don’t get enough power and the engine can stall.
Will the car run if I disconnect the battery while it’s running?
Don’t do this. On older vehicles it was a crude test. On modern vehicles it can create voltage spikes and damage electronics. Use a multimeter instead.
My battery light comes on and off. Is it the alternator?
Often, yes, but it can also be belt slip, a failing tensioner, wiring issues, or a weak connection at the battery. Test charging voltage when the light is on if you can do so safely.
Why does it only fail when it’s cold?
Cold thickens engine oil and reduces battery output. A marginal battery that seems fine in warm weather can fall on its face in winter.
When to stop DIY
If you see melted wiring, smell burning insulation, have repeated blown fuses, or your voltage readings are wildly unstable, it’s time for a pro diagnosis. Electrical problems can escalate quickly, and I’d rather you pay for an hour of diagnostic time than accidentally cook a wiring harness.
But in the majority of everyday no-start situations, the steps above will get you to a confident answer. And that confidence is what keeps you from buying parts you didn’t need in the first place.