
Nothing tests my patience like an AC that quits on the first hot day. The good news is you can diagnose most “blows warm” problems in a methodical way without guessing, and without tossing random parts at the car.
This walkthrough is how I approached AC complaints in the shop: verify the symptoms, confirm the compressor is doing its job, then follow the clues toward refrigerant level, airflow issues, electrical faults, or a leak. Grab a flashlight, a clean rag, and your calm mechanic brain.

Quick safety and reality check
Car AC systems are high-pressure and the refrigerant can cause frostbite if it hits skin. In a lot of places, intentionally venting refrigerant is illegal, and even where rules differ, it is still the wrong move. You can do a lot of diagnosis without opening the system at all.
- Wear eye protection any time you are under the hood with the AC running.
- Keep hands and clothing clear of belts and fans.
- Do not “top off” blindly with a parts-store can if you do not know system pressures. Overcharging can make cooling worse and can damage components.
- If you suspect a significant leak or very low charge (oil everywhere, obvious hissing, or rapid cycling paired with poor cooling), stop running the AC and move to leak checks.
Step 1: Confirm the symptom
Before we blame the compressor, confirm you truly have a cooling failure and not a blend-door or airflow issue.
Set the car up for a proper test
- Engine fully warmed up, idling around normal idle speed.
- Temperature set to full cold, AC on.
- Start with windows down for 30 to 60 seconds to purge the heat soak, then switch to recirculation for best cooling.
- Blower on medium-high.
- Let it run 2 to 3 minutes to stabilize.
What you are looking for
- Air is warm at idle and improves while driving: often low refrigerant, weak condenser airflow (fans), or a condenser clogged with debris.
- Air is never cold, even at speed: likely a refrigerant issue, compressor issue, control issue, or a large leak.
- One side cold, one side warm (dual-zone systems): a blend door actuator or temperature door problem can mimic an AC failure.
- Airflow is weak no matter what: do not skip basics like a clogged cabin air filter, a weak blower motor, or a blocked intake.
Step 2: Pop the hood and check the compressor
This is the fastest “yes or no” test in the whole process, with one caveat: some vehicles use clutchless or differently controlled compressors, so “watch the clutch” is not universal. If yours has a visible clutch, this still works great.
How to spot it
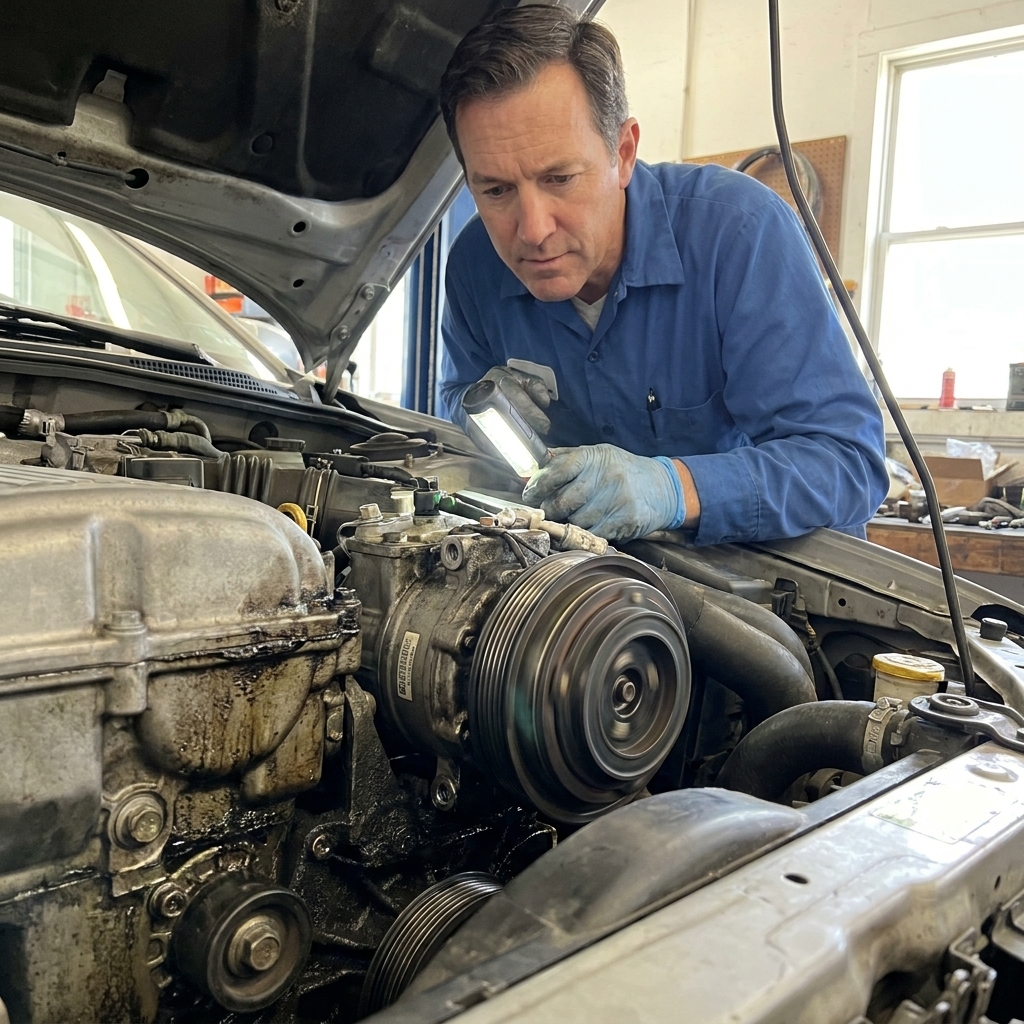
Find the AC compressor (usually driven by the serpentine belt). The pulley spins anytime the engine runs. On a clutch-style setup, the clutch plate on the face should click and start spinning when the AC is commanded on.
If the clutch does not engage
If the clutch never clicks on, the system is either not being commanded on or it is being blocked by a safety condition (low pressure, high pressure, overheating, etc.). Work down this list:
Check the simple stuff first
- AC button and settings: Make sure the AC request is actually on. Some modes (eco, auto) may reduce AC output. In defrost, many vehicles request AC to dehumidify, but the system can still inhibit compressor operation due to low ambient temperature, abnormal pressure, or other protection logic.
- Fuses and relays: Check the AC compressor fuse, clutch fuse, and the AC relay. A relay swap with an identical one can be a quick test.
- Condenser fans: Many cars will limit or shut down AC if the fan command is not working or the system pressure is abnormal. With AC on, the radiator or condenser fan should usually run.
Common reason: low refrigerant tripped the low-pressure protection
Low refrigerant is the number one reason a clutch will not engage. The system is protecting the compressor from running with insufficient oil circulation.
At this point you can still diagnose without cracking the system open: look for leaks (more on that below) and, if you have proper gauges, check static pressure.
Electrical checks (basic DIY level)
If you are comfortable with a multimeter, you can check whether the clutch is receiving power. A working system should provide battery voltage to the clutch coil when AC is requested and all conditions are met.
- Power present, clutch not pulling in: clutch coil may be bad, clutch air gap may be excessive, or the compressor may be seized.
- No power to clutch: control side problem (pressure switch or sensor, relay command, HVAC control head, wiring, ECU logic).
If you get into wiring diagnostics, a factory wiring diagram becomes your best friend.
If the compressor runs but air is warm
Now we know the system is at least trying. Warm air with a running compressor usually comes down to one of these:
- Low refrigerant (most common, especially if it cools a little then fades)
- Restricted airflow across the condenser (fan problem, debris blockage)
- Expansion valve or orifice tube restriction
- Compressor output problem (not pumping or not being commanded correctly)
- Blend door stuck on heat (AC is cold, but it is being reheated in the HVAC box)
Step 3: Airflow checks
AC performance depends on shedding heat at the condenser, which sits in front of the radiator on most cars. If it cannot get rid of heat, your vent temps rise. And if cabin airflow is weak, “AC feels warm” can really mean “not enough air moving.”
Condenser fan test
- With AC on, verify the fans run. Some cars have multiple speeds.
- If fans do not run, diagnose fans before touching refrigerant. Bad fans can make pressures climb and cooling vanish at idle.
Condenser face inspection
Look through the grille at the condenser fins. If it is packed with bugs, leaves, or road grime, clean it carefully with low-pressure water from the engine side out. Bent fins reduce airflow.

Step 4: Use pressures wisely
If you want to be systematic, nothing beats a proper manifold gauge set. Cheap single-hose recharge kits can mislead you because they only show low-side pressure and often do it poorly.
Pressures vary by vehicle, refrigerant type, humidity, and ambient temperature. When possible, compare to a factory spec or a pressure-temperature chart for your refrigerant, especially for static pressure.
Static pressure (engine off)
With the engine off for at least 10 minutes and the system at rest, high and low pressures should equalize. Static pressure roughly tracks outside temperature.
- Very low static pressure: likely low refrigerant from a leak.
- Normal static pressure but poor cooling: points toward airflow issues, a restriction, or a compressor that is not pumping under load.
Running pressures (engine on, AC max)
Rather than chasing a single magic number, you are looking for patterns in normal ambient conditions, and you are backing those patterns up with line temperatures and fan operation:
- Low side low, high side low: often undercharge, but can also be weak compressor output. Very low ambient temperatures can also skew readings.
- Low side high, high side low-ish: compressor not pumping effectively, a control valve issue on some variable displacement compressors, or a metering device problem that is not controlling flow correctly. Check line temps and condenser airflow before you call it.
- Low side very low, high side high: restriction at the expansion valve or orifice tube, or moisture contamination freezing at the metering device.
- High side extremely high: condenser airflow problem, overcharge, non-condensable gases (bad charging practices), or a restriction on the high side.
If pressures are abnormal and you are not confident interpreting them, this is where I tell DIYers to pause and either research your exact platform or bring the data to a shop. A good shop will appreciate that you did real observation instead of “it needs a compressor, I think.”
Step 5: Vent and line temperatures
Numbers help you avoid vibes-based diagnosis.
Vent temp
Stick a simple thermometer in the center vent. On a healthy system, you should see a significant drop from ambient once stabilized. Exact temperatures vary, but if it is barely cooler than outside air, something is off.
Touch test on AC lines (quick, not perfect)
Carefully feel the aluminum lines:
- Suction line (larger line) should be cold and may sweat. If it is warm, the system is not absorbing heat well (low charge, restriction, compressor issue).
- Discharge line (smaller line) should be hot. If it is not getting hot, the compressor may not be compressing.
Use common sense: these parts can be hot enough to burn you.
Evaporator freeze-up (intermittent cold then warm)
If the AC starts cold, then fades to warm, and you see the suction line or the evaporator case area frosting up, the evaporator may be freezing. Low refrigerant, a faulty pressure sensor, a stuck metering device, or airflow issues (like a dirty cabin air filter) can all contribute. Sometimes you will also notice airflow slowly getting weaker as ice builds, then it “comes back” after you shut the AC off for a bit.
Step 6: Find the leak first
If refrigerant is low, it left the system. Refrigerant does not get “used up.” Most warm-AC complaints I saw were slow leaks that became obvious only when summer hit.
Look for oily dirt first
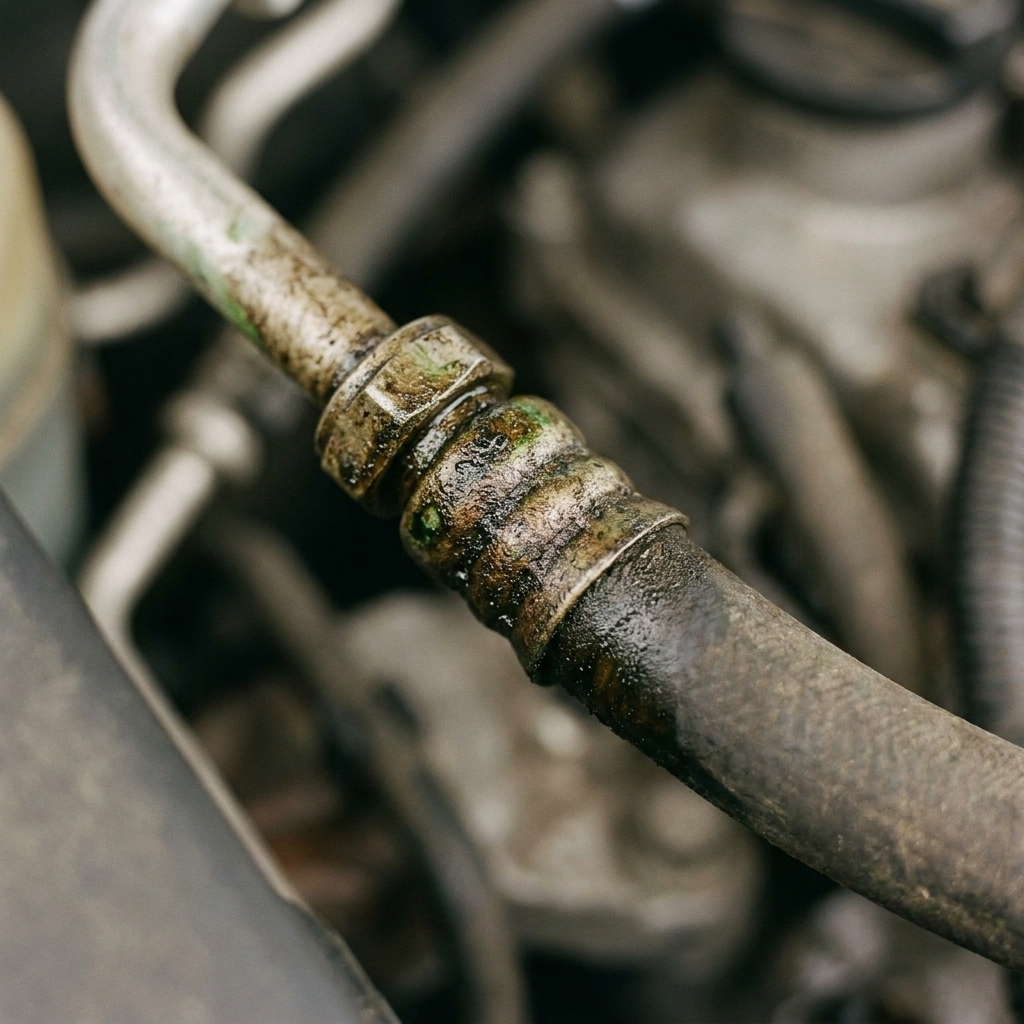
Refrigerant carries oil. Where it leaks, oil often seeps out and grabs dust.
- Inspect AC hose crimps and fittings
- Check the condenser corners and lower area (road debris damage is common)
- Look at the compressor body and around the front seal
- Inspect the service ports for oily residue
UV dye: the leak-finding cheat code
If your system has UV dye in it (many do from the factory or from past service), a UV flashlight and yellow glasses can make leaks jump out.
How to check with UV light
- Wait until dusk or move into a dim garage.
- Scan fittings, condenser, compressor, and the low points of hoses.
- Look for bright yellow-green staining.
If the system is empty and you cannot run the AC, dye may not circulate, so UV might not show much. In that case, a shop may use nitrogen pressure testing or a smoke machine to pinpoint leaks.

Common leak points
- Condenser: rock strikes, corrosion, or damage from minor front-end bumps.
- Compressor shaft seal: oily sling near the clutch area.
- Service valves: the Schrader cores can leak, especially after repeated recharges.
- Hose crimps: seepage at rubber-to-metal transitions.
- Evaporator core: the sneaky one. Leaks inside the dash often show as dye coming from the condensate drain tube under the car, or an oily smell.
Compressor issues
“Bad compressor” can mean a few different things, and it matters because the repair strategy changes.
Clutch issues
- Worn clutch can slip under load, especially at idle. You may hear chirping or see the clutch face discolor.
- Excessive clutch air gap can prevent engagement when hot.
Variable and clutchless compressors
Some modern systems use variable displacement compressors and some are clutchless or continuously driven. On those setups, you might not see normal on-off clutch behavior, and weak cooling can come from a stuck control valve, a command issue, or a sensor problem even though the compressor is physically turning.
Internal compressor failure
If a compressor fails internally, it can send metal debris through the system. Signs include:
- Growling or grinding noises from the compressor
- Consistently abnormal pressures and poor cooling
- Metal shavings found in the orifice tube or accumulator screen
This is not a simple “swap the compressor” job. Proper repair often involves flushing lines, replacing the condenser (many are not flushable), replacing the receiver-drier or accumulator, and pulling a deep vacuum before charging by weight.
Blend door problems
I have watched perfectly good AC systems get condemned because the HVAC box was mixing in heat.
Clues it is a blend door or actuator
- One side cold and the other warm on dual-zone setups
- Clicking from the dash when changing temperature
- Vent temps change when you wiggle the temp setting, but never go truly cold
A quick check: with AC running, feel the two heater hoses going into the firewall. If both are hot, the heater core is hot. That is normal. The blend door’s job is to keep that heat separated when you ask for cold.
Refrigerant types: quick note
Most vehicles on the road use R-134a or R-1234yf. Service procedures are similar in concept, but R-1234yf systems tend to be more expensive to service and are less forgiving of sloppy handling. Either way, proper recovery, vacuum, and charging by weight is the correct play once the system is opened.
What not to do
- Do not keep adding refrigerant every summer. That is like topping off engine oil without fixing the leak. It will get worse and can take out major components.
- Do not judge charge level by low-side pressure alone. You can overcharge and still see “okay” low-side numbers.
- Do not skip the vacuum step after opening the system. Air and moisture in the system kill performance and can create corrosive acids.
- Do not mix refrigerants or use sealers. Sealers can contaminate professional recovery machines and may get you turned away by shops.
When a shop visit makes sense
DIY diagnosis is great, but there are moments when professional equipment saves you money:
- You suspect the system is empty and you cannot find an obvious leak
- You need to evacuate and recharge by weight (the correct way)
- You suspect compressor debris contamination
- You need an evaporator core confirmed (dash work is not fun)
If you show up with notes like “compressor runs, fans run, pressures are X and Y at 85°F ambient, UV dye visible at condenser corner,” you are harder to scam and easier to help. That is the goal.
DIY checklist
- Verify settings and symptoms (purge cabin heat, recirc, stabilized)
- Check cabin airflow (cabin air filter, blower strength)
- Confirm condenser fans run with AC on
- Watch compressor operation (clutch behavior if equipped)
- Inspect condenser face for blockage
- Check for oily residue at fittings, compressor, condenser
- Use UV light to hunt dye if present
- If you have gauges, compare static and running pressures to ambient and patterns
- Consider blend door issues if pressures and lines suggest the AC is actually working
FAQ
Can low refrigerant make the AC blow warm intermittently?
Yes. Low charge often shows up as “kind of cool at first, then warm,” or cold while driving but warm at stoplights. The system may also short-cycle as pressure drops.
Why does my AC get cold only when I rev the engine?
Could be low refrigerant, weak condenser airflow at idle (fans not moving enough air), or a compressor that is weak at low speed. Fan operation is a big one here.
Is it normal for the compressor to cycle on and off?
Many systems cycle by design, especially in mild weather. Rapid cycling every few seconds often points to low refrigerant, a pressure control issue, or incorrect charge.
Do I really need a vacuum pump if I replace an AC part?
If the system was opened to the atmosphere, yes. Pulling a vacuum removes air and moisture and is essential for performance and component life. Charging without evacuating is a common reason “it still isn’t cold” after a DIY repair.